Actually, the inspiration for the tongue twister "She sells seashells on the sea shore" in the title was a person: Mary Anning, an English fossil collector in the 19th century who found and correctly identified quite a few Jurassic fossils, but never received much credit in her lifetime.
An adaption of this pattern for loom knitting has been written by SparkiLady (Ravelry-Name) - it is available here.

This work by Knitting and so on is licensed under a Creative Commons Attribution-NonCommercial-ShareAlike 4.0 International License.

Materials/Size
- per coaster I used less than 10 grams of DK weight cotton, but other yarn weights will work as well
- I used 3mm dpns
- a tapestry needle to weave in ends
Techniques & Notation
- Long-Tail Cast On: As shown in this YouTube video by Studio Knit
- Intarsia: Changing colors with the intarsia technique - as shown in this YouTube video by knitwithpat; or this YouTube video by Francoise Danoy.
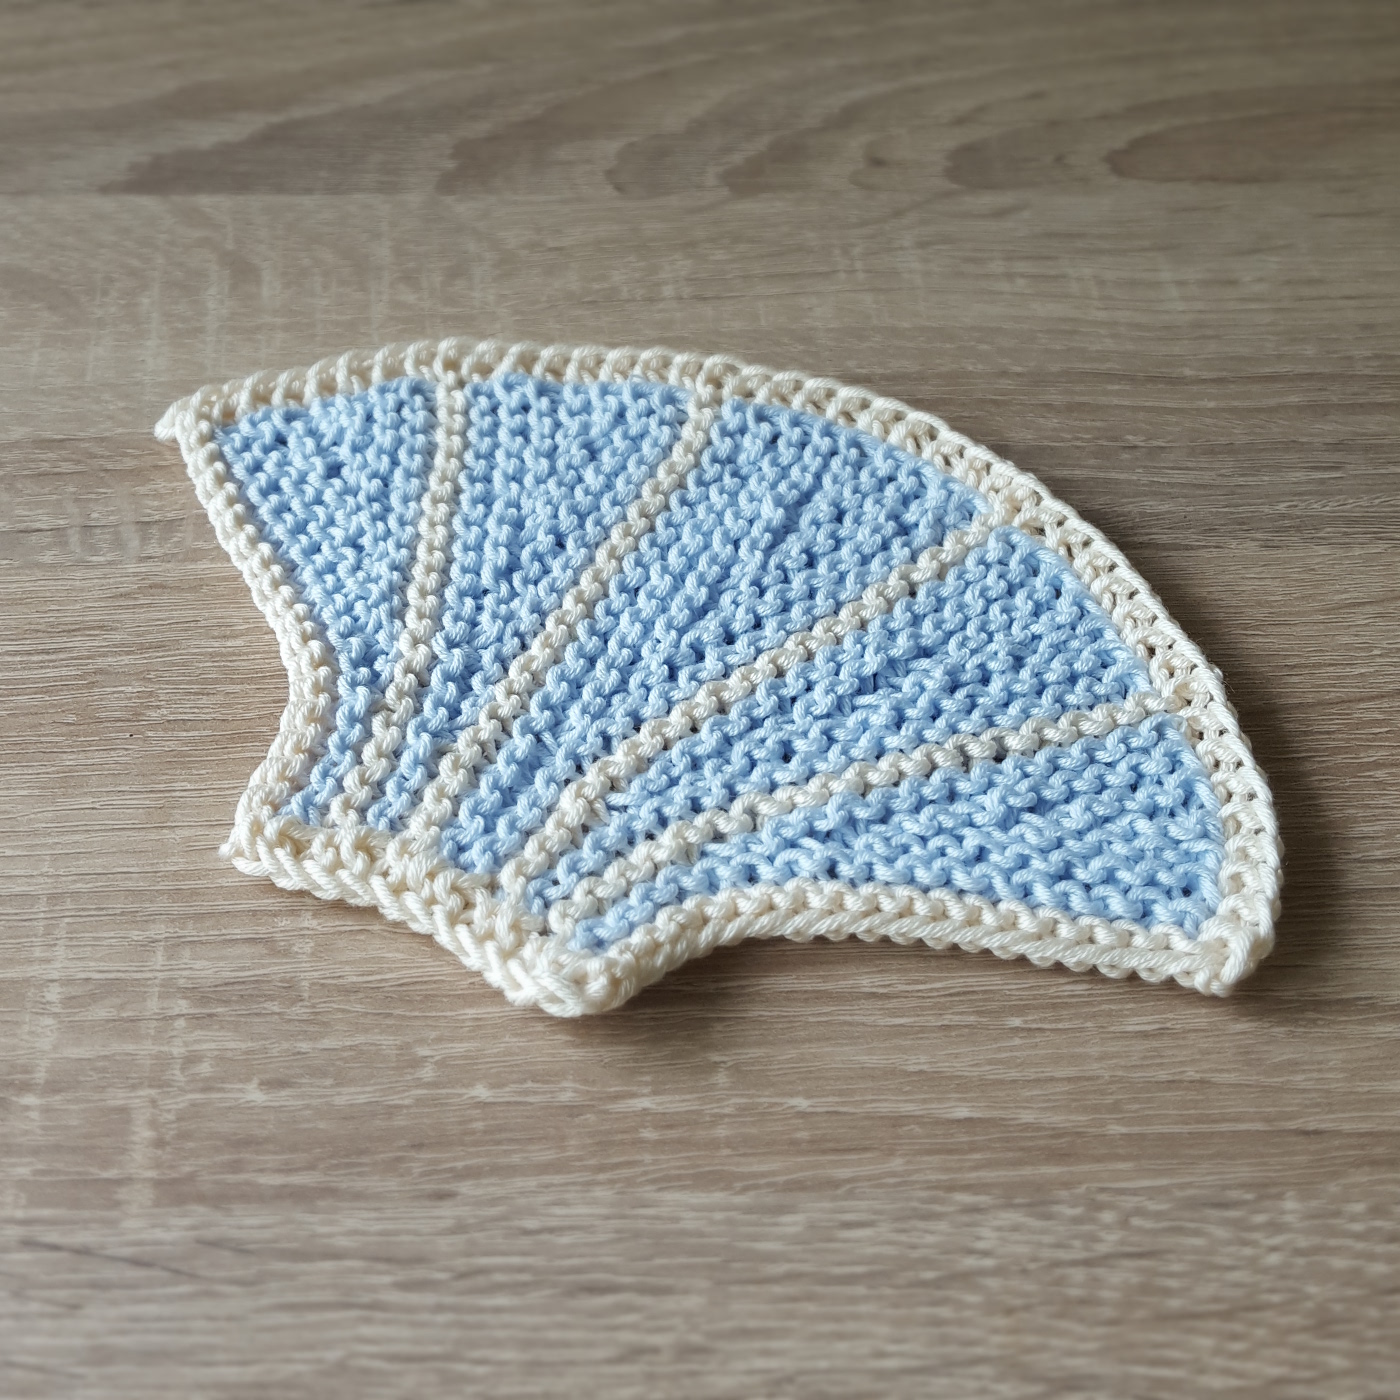
Please note that for this pattern the last 2 stitches in CC of a row (when they are reached after using the MC - which only happens 6 times) are knitted with the tail of that was left over by the long tail CO. That way, it is not necessary to use a 2nd skein or bobbin in CC - and it also avoids two more ends to weave in :) See photo below.

- Short Rows (t+p): Short rows are one of my favorite knitting techniques because they not only allow you to shape your knitting but also to created interesting graphical pattern. There are several techniques for short rows – and it’s a matter of taste which one you prefer. I’ve recently learned a technique called German short rows: when you turn, bring yarn to the front and pull it back so that a sort of double-stitch is created, then knit back as usual - when you have to knit the double-stitch, be careful to knit it as one stitch (see also this YouTube video); this method has the advantage the no picking up of stitches is necessary. In the pattern, this stitch will be called t+p (turn and pull).
When the pattern says, t+p it means that the stitch you just knitted should be pulled, i.e. you don't have to knit another stitch to t+p. - Throughout the pattern, the following notation will be used: "CC (k2); MC (k13, t+p, k12); CC(k2) 13, w+t, k13)" means "knit 2 sts with CC; change to MC and knit 13, do a turn an pull, knit 12 stitches with MC; change back to CC and knit the 2 stitches
- CCtail (k2, turn, sl1, k1) means "with the tail of CC knit 2 stitches, turn, sl1 and k1". In order to avoid a second skein or bobbin (and two more ends to weave in). You're asked to leave a tail of your CO and knit with it.
Instructions
CO21 in CC with long tail CO, but leave a tail of at least 80 cm - this tail will be used to knit the CC edge stitches on this side of the piece.
Setup Row: k all sts
Ridge 1: CC (sl1, k1); MC (k17); CCtail (k2, turn, sl1, k1); MC (k17); CC (k2)
Ridge 2: CC (sl1, k1); MC (k12, t+p, k11); CC (k2)
Ridge 3: CC (sl1, k1); MC (k8, t+p, k7); CC (k2)
Ridge 4: CC (sl1, k1); MC (k1, kfb, k1 t+p, k3); CC (k2)
Ridge 5: CC (sl1, k1); MC (k7, t+p, k6); CC (k2)
Ridge 6: CC (sl1, k1); MC (k11, t+p, k10); CC (k2)
Ridge 7: CC (sl1, k1); MC (k15, t+p, k14); CC (k2)
Ridge 8: CC (sl1, k21, turn, sl1, k21)
Ridge 9: CC (sl1, k1); MC (k18); CCtail (k2, turn, sl1, k1); MC (k18); CC (k2)
Ridge 10: CC (sl1, k1); MC (k13, t+p, k12); CC (k2)
Ridge 11: CC (sl1, k1); MC (k9, t+p, k8); CC (k2)
Ridge 12: CC (sl1, k1); MC (k1, kfb, k2, t+p, k4); CC (k2)
Ridge 13: CC (sl1, k1); MC (k8, t+p, k7); CC (k2)
Ridge 14: CC (sl1, k1); MC (k12, t+p, k11); CC (k2)
Ridge 15: CC (sl1, k1); MC (k16, t+p, k15); CC (k2)
Ridge 16: CC (sl1, k22, turn, sl1, k22)
Ridge 17: CC (sl1, k1); MC (k19); CCtail (k2, turn, sl1, k1); MC (k19); CC (k2)
Ridge 18: CC (sl1, k1); MC (k1, kfb, k10, t+p, k12); CC (k2)
Ridge 19: CC (sl1, k1); MC (k11, t+p, k10); CC (k2)
Ridge 20: CC (sl1, k1); MC (k7, t+p, k6); CC (k2)
Ridge 21: CC (sl1, k1); MC (k5, t+p, k4); CC (k2)
Ridge 22: CC (sl1, k1); MC (k9, t+p, k8); CC (k2)
Ridge 23: CC (sl1, k1); MC (k12, t+p, k11); CC (k2)
Ridge 24: CC (sl1, k1); MC (k1, ssk, k12, t+p, k13); CC (k2)
Ridge 25: CC (sl1, k1); MC (k19); CCtail (k2, turn, sl1, k1); MC (k19); CC (k2)
Ridge 26: CC (sl1, k22, turn, sl1, k22)
Ridge 27: CC (sl1, k1); MC (k16, t+p, k15); CC (k2)
Ridge 28: CC (sl1, k1); MC (k12, t+p, k11); CC (k2)
Ridge 29: CC (sl1, k1); MC (k8, t+p, k7); CC (k2)
Ridge 30: CC (sl1, k1); MC (k1, ssk, k3, t+p, k4); CC (k2)
Ridge 31: CC (sl1, k1); MC (k9, t+p, k8); CC (k2)
Ridge 32: CC (sl1, k1); MC (k13, t+p, k12); CC (k2)
Ridge 33: CC (sl1, k1); MC (k18); CCtail (k2, turn, sl1, k1); MC (k18); CC (k2)
Ridge 34: CC (sl1, k21, turn, sl1, k21)
Ridge 35: CC (sl1, k1); MC (k15, t+p, k14); CC (k2)
Ridge 36: CC (sl1, k1); MC (k11, t+p, k10); CC (k2)
Ridge 37: CC (sl1, k1); MC (k7, t+p, k6); CC (k2)
Ridge 38: CC (sl1, k1); MC (k1, ssk, k2, t+p, k3); CC (k2)
Ridge 39: CC (sl1, k1); MC (k8, t+p, k7); CC (k2)
Ridge 40: CC (sl1, k1); MC (k12, t+p, k11); CC (k2)
Ridge 41: CC (sl1, k1); MC (k17); CCtail (k2, turn, sl1, k1); MC (k17); CC (k2)
Ridge 42: CC (sl1, k to end, turn; bind off)
Chart
If you prefer to work from a chart, here's one. The numbers in front of the ridge indicate the number of stitches per color - the green number for the CC stitches and the black number for the MC stitches.
The pink dotted line are only there to help you counting. They have a distance of 5 stitches and start at the end of the row - after the last two CC color end stitches.


 |
| The cake in this picture is a chocolate babka - I used this recipe (in German) |
This post was featured at the Tuesday PINspiration Link Party, at the Brag about it link party 28-17, and at the Sew it, Craft it Cook it Link Party #13. Thank you!


Thank you! I love your designs, and these will be fun to make for my daughter, who lives on the Atlantic Coast. (Far from the Pacific Coast, where I live.) Dot
AntwortenLöschenThank you so much.
LöschenThat's quite a distance!
Happy knitting!
These are so much fun! These would also make great motifs using a thinner yarn.
AntwortenLöschenAlexandra
EyeLoveKnots.blogspot.com
Yes, or maybe as appliques.
LöschenThanks!
What a great idea! I love them 😊
AntwortenLöschenThank you ♥
LöschenLovely !
AntwortenLöschenAnna
They're lovely! The colours are really subtle and summery too :) x
AntwortenLöschenThank you ♥
LöschenHappy crafting!
These are beautiful, thanks for sharing the pattern. I can imagine all sorts of uses for them too, maybe as a applique on a beach bag?
AntwortenLöschenThank you ♥. Yes, they would look good on a beach bag!
LöschenI love all things coastal and your sea shell coasters are lovely! Thanks for sharing at Brag About It Party. I'll be featuring this at tomorrow's party.
AntwortenLöschen♥ ♥ Thank you so much for the feature ♥ ♥
LöschenThe coasters look so summery! Thanks for sharing at Sew It Cook It Craft It! You're one of my features today.
AntwortenLöschenThanks for the feature and for hosting your lovely link party ♥
LöschenExcellent work. I love it. Thanks
AntwortenLöschenLovely blog. Thanks for sharing with us.
AntwortenLöschen